Introduction
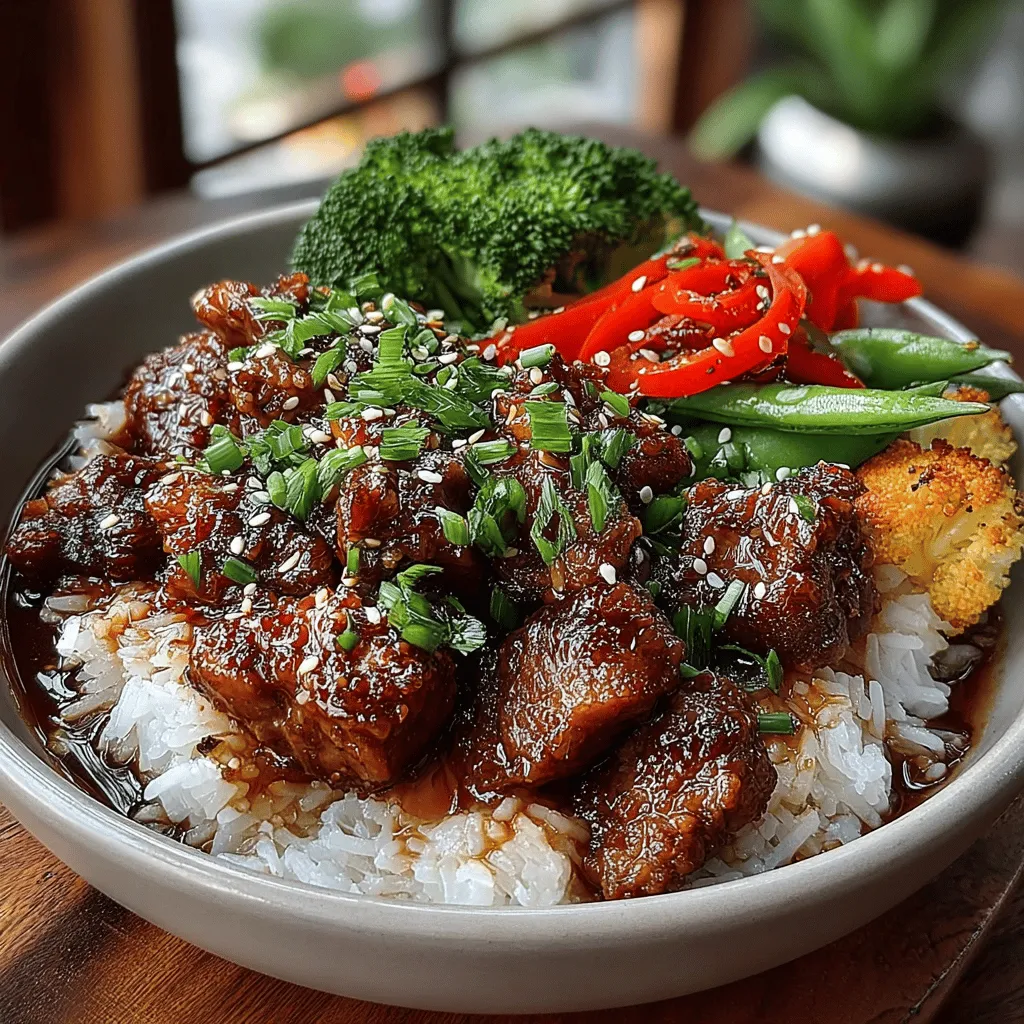
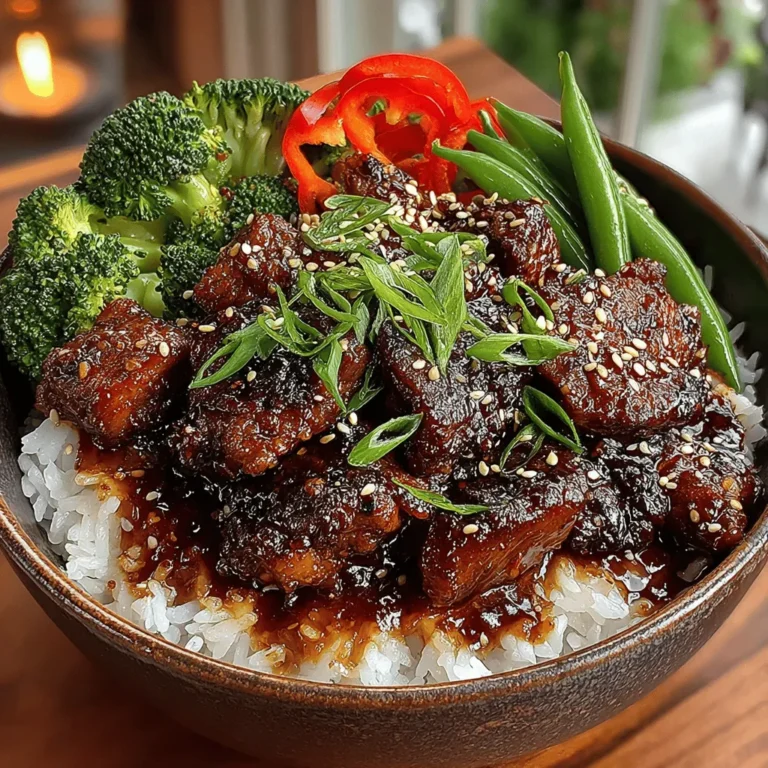
Sweet Sticky Teriyaki Chicken Bowls are not just a meal; they are a culinary experience that brings the vibrant flavors of Japan into your home kitchen. This dish is a harmonious blend of tender, marinated chicken thighs, fluffy jasmine rice, and a colorful array of steamed vegetables, all drizzled with a luscious homemade teriyaki sauce. Not only is this recipe visually appealing, but it is also packed with nutrients, making it an ideal choice for a wholesome family dinner. What’s more, this delightful recipe can be prepared in under an hour, making it perfect for busy weeknights.
In this article, we will delve into the origins of teriyaki, the essential ingredients that make up this dish, and provide you with step-by-step instructions on crafting these flavorful bowls. Whether you’re a seasoned cook or a novice in the kitchen, this recipe is straightforward and approachable, ensuring that you can impress your family or guests with minimal effort.
Understanding Teriyaki: A Brief Overview
Exploring the Origin of Teriyaki
Teriyaki, which translates to “glazed grill,” hails from Japan, where it has become a beloved cooking method. Historically, the technique was used to prepare various proteins, including fish, meat, and poultry, with a soy-based marinade that gives it a rich flavor. The unique combination of grilling and glazing not only enhances the taste but also creates an appetizing caramelized exterior.
Culturally, teriyaki has evolved over the years, influenced by both traditional Japanese cooking and adaptations in Western cuisine. It has become a staple in many households, where it is often featured in various forms, from grilled meats to stir-fries and beyond. The traditional teriyaki sauce is a key element, composed of simple yet impactful ingredients that contribute to its signature flavor.
How Teriyaki Sauce is Made
The backbone of any good teriyaki dish is its sauce. Typically, teriyaki sauce consists of four primary components: soy sauce, mirin (a sweet rice wine), sugar (often brown or white), and sake (a Japanese rice wine). These ingredients work in harmony to create a balance of salty, sweet, and umami flavors that perfectly complement the meat being marinated.
However, many home cooks prefer to create their own versions of teriyaki sauce, adjusting the sweetness and thickness to suit their tastes. Homemade teriyaki sauce often includes additional flavor enhancers such as garlic, ginger, and sesame oil, giving it a distinct and personal touch. While store-bought varieties can be convenient, making your own allows for greater control over the ingredients and flavor profile.
Ingredient Breakdown: Sweet Sticky Teriyaki Chicken Bowls
Essential Chicken Marinade Ingredients
The marinade for the Sweet Sticky Teriyaki Chicken is where the magic begins. Key components include soy sauce, honey, and rice vinegar. The soy sauce provides the salty depth, while honey introduces a natural sweetness that caramelizes beautifully when cooked. Rice vinegar adds a hint of acidity, balancing the flavors and enhancing the overall taste of the dish.
In addition to these base ingredients, sesame oil plays a crucial role in flavor enhancement. Its nutty aroma and taste elevate the dish, providing a depth that is often associated with authentic Asian cuisine. Fresh garlic and ginger are indispensable in this recipe; they contribute warmth and zest, enriching the marinade and ensuring that each bite is bursting with flavor.
Choosing the Right Chicken
When it comes to selecting chicken for this recipe, boneless, skinless chicken thighs are the ideal choice. Unlike chicken breasts, thighs remain juicy and tender even after cooking, making them perfect for marinating. Their slightly higher fat content contributes to a richer flavor and a delectable texture that pairs beautifully with the teriyaki sauce.
For those with dietary restrictions or preferences, there are alternatives available. Chicken breasts can be used as a leaner option, while those seeking a vegetarian or vegan substitute might opt for tofu, tempeh, or even seitan, which can absorb the marinade flavors similarly to chicken.
Rice Selection and Cooking
The rice you choose to serve with your Sweet Sticky Teriyaki Chicken plays a significant role in the overall dish. Jasmine rice is often recommended due to its fragrant aroma and slightly sticky texture when cooked, making it an excellent complement to the saucy chicken. The light and fluffy grains help to absorb the teriyaki sauce, ensuring that each bite is flavorful.
If you prefer a healthier alternative, brown rice, basmati rice, or even quinoa can be used. Brown rice adds a nutty flavor and is higher in fiber, while basmati rice offers a fragrant and fluffy texture. Quinoa, a protein-rich grain, can be an excellent base for those looking for gluten-free options.
Vegetable Varieties for a Nutrient Boost
To round out your Sweet Sticky Teriyaki Chicken Bowls, incorporating vegetables is essential for both color and nutrition. Broccoli, snap peas, and bell peppers are popular choices, each providing a unique texture and flavor profile. Broccoli is rich in vitamins C and K, while snap peas contribute a satisfying crunch and natural sweetness. Bell peppers, available in various colors, add vibrant hues and are packed with antioxidants.
When selecting vegetables, consider seasonal options or personal preferences. Carrots, zucchini, or bok choy can also make excellent additions, ensuring your bowls are not only delicious but also visually appealing and nutritious.
Step-by-Step Instructions for Preparation
Marinating the Chicken
The first step in creating your Sweet Sticky Teriyaki Chicken is marinating the chicken. This process is vital for flavor infusion, allowing the chicken to absorb the delicious teriyaki sauce fully. Begin by combining soy sauce, honey, rice vinegar, sesame oil, minced garlic, and grated ginger in a bowl. Whisk the ingredients together until well blended.
Next, place the boneless, skinless chicken thighs in a resealable plastic bag or a shallow dish. Pour the marinade over the chicken, ensuring that each piece is thoroughly coated. Seal the bag or cover the dish with plastic wrap and refrigerate for at least 30 minutes, though marinating for a few hours or overnight will yield even more intense flavors. While the chicken is marinating, you can prepare the rice and vegetables, setting the stage for a beautifully coordinated meal.
Stay tuned for the next part, where we will walk you through the cooking process and the final assembly of your Sweet Sticky Teriyaki Chicken Bowls.

Tips for Achieving the Perfect Marinade Consistency
Creating the perfect teriyaki marinade is essential for infusing your chicken with that iconic sweet and savory flavor. To achieve the right consistency, keep the following tips in mind:
– Ingredient Ratios: Start with a balanced ratio of soy sauce, mirin (or rice vinegar), and a sweetener like brown sugar or honey. A good guideline is 2:1:1—two parts soy sauce, one part mirin, and one part sweetener. Adjust these amounts based on your taste preference.
– Thickening Agents: If you prefer a thicker sauce that clings to the chicken, consider incorporating cornstarch. Mix 1 tablespoon of cornstarch with 2 tablespoons of water to create a slurry. Add this to your marinade during the cooking process to achieve that sticky texture.
– Marination Time: Allow the chicken to marinate for at least 30 minutes to absorb the flavors, but for best results, marinate it overnight in the refrigerator. This not only enhances flavor but also tenderizes the meat.
Cooking the Rice Perfectly
Rice is the foundation of your teriyaki chicken bowl, and getting it right is crucial for a satisfying meal.
Rinsing Rice: Why It Matters
Rinsing rice before cooking is a vital step that helps remove excess starch. This process prevents the rice from becoming gummy and ensures a light and fluffy texture. To rinse:
1. Place the rice in a fine-mesh sieve or a bowl.
2. Rinse under cold water, swishing the rice gently with your hand.
3. Continue rinsing until the water runs clear, which indicates that most excess starch has been removed.
Techniques for Achieving Fluffy Rice Every Time
Once rinsed, cooking the rice properly is key. Here are techniques to ensure fluffy rice:
– Water Ratio: Use the right water-to-rice ratio, typically 1.5 to 2 cups of water per cup of rice, depending on the type of rice you’re using. For long-grain rice, stick closer to the 1.5:1 ratio, while short-grain rice may require more water.
– Cooking Method: You can cook rice on the stovetop or in a rice cooker. If using the stovetop, bring the water to a boil, then reduce to low heat, cover, and simmer for 18-20 minutes without lifting the lid.
– Resting Time: After cooking, let the rice rest for about 10 minutes off the heat, covered. This allows the steam to finish cooking the rice and helps achieve a fluffier texture.
Preparing the Vegetables
The vegetables in your teriyaki chicken bowl should complement the chicken and rice, both in flavor and nutrition.
Best Steaming Methods for Retaining Nutrients and Color
Steaming is one of the best cooking methods for vegetables, preserving both nutrients and vibrant colors. Here are some effective steaming techniques:
– Use a Steamer Basket: Place your vegetables in a steamer basket over boiling water. This method allows steam to circulate around the veggies, cooking them evenly without submerging them in water.
– Timing: Broccoli and snap peas take about 3-5 minutes to steam, while carrots may take 5-7 minutes. Keep a close eye on them to ensure they remain crisp and bright.
Timing Tips for Adding Vegetables to Ensure They Remain Crisp
To achieve the best texture, consider the following timing tips:
– Staggered Cooking: If you’re cooking multiple types of vegetables, add the denser vegetables (like carrots) first, allowing them to steam for a minute before adding the more delicate ones (like broccoli and bell peppers). This ensures that everything comes out perfectly cooked.
– Quick Blanching: If you prefer a bit of crunch, quick blanching can be effective. Briefly boil the vegetables for 1-2 minutes, then plunge them into ice water to halt the cooking process. This method helps retain both color and crispness.
Cooking the Chicken to Perfection
Getting your chicken just right is critical for your teriyaki chicken bowls.
Key Signs That Chicken is Cooked Through
Cooked chicken should be juicy and tender, with an internal temperature of 165°F (75°C). Here’s how to tell:
– Color: Cut into the thickest part of the chicken; it should be opaque and white throughout. If you see pink, it needs more cooking.
– Juices: When the chicken is fully cooked, the juices should run clear. If they’re still pink or red, continue cooking.
How to Create a Sticky Sauce Using Cornstarch
To achieve that mouthwatering sticky sauce, follow these steps:
1. Make the Marinade: Use the marinade you’ve prepared, adding it to a saucepan over medium heat.
2. Incorporate Cornstarch: Once the marinade starts to simmer, slowly whisk in the cornstarch slurry you prepared earlier. Stir continuously until the sauce thickens, which should take about 1-2 minutes.
3. Coat the Chicken: Add your cooked chicken to the thickened sauce, tossing it gently to coat each piece evenly. The result will be a deliciously sticky glaze that’s essential for your teriyaki chicken bowls.
Assembling Your Sweet Sticky Teriyaki Chicken Bowls
Now that all your components are ready, it’s time to assemble your Sweet Sticky Teriyaki Chicken Bowls.
Fluffing the Rice
Before layering your ingredients, fluff the rice for a beautiful presentation:
– Use a Fork: After the rice has rested, use a fork to gently fluff the grains. This aerates the rice and prevents clumping, making it visually appealing.
– Serving Size: Aim for about one cup of rice per serving, depending on your appetite.
Layering Ingredients for the Best Flavor Experience
For optimal flavor in every bite, follow these assembly tips:
1. Start with Rice: Spoon the fluffed rice into the bottom of your bowls as the base layer.
2. Add Chicken: Gently place the sticky teriyaki chicken on top, ensuring each bowl has an equal distribution.
3. Vegetables Next: Strategically place your steamed vegetables around the chicken for visually appealing color contrast.
Garnishing Tips: Using Green Onions and Sesame Seeds to Elevate the Dish
A few finishing touches can elevate your teriyaki bowl:
– Green Onions: Thinly slice green onions and sprinkle them generously over the top for a fresh and zesty flavor.
– Sesame Seeds: Toasted sesame seeds add a nutty crunch and an elegant touch. Simply sprinkle them on right before serving.
Serving Suggestions
Pair your Sweet Sticky Teriyaki Chicken Bowls with complementary dishes and beverages to enhance your meal experience.
Complementary Side Dishes to Enhance the Meal
Consider serving with:
– Miso Soup: A warm bowl of miso soup balances the flavors of the teriyaki chicken and adds warmth to your meal.
– Cucumber Salad: A refreshing cucumber salad dressed in rice vinegar complements the savory flavors of the teriyaki chicken.
Beverage Pairings: What to Drink with Your Teriyaki Chicken
Great beverage options include:
– Green Tea: Its subtle flavor and health benefits make green tea an excellent choice to accompany your teriyaki bowls.
– Sake: If you want to indulge, a chilled sake pairs beautifully with the umami flavors of teriyaki.
Nutritional Information and Benefits
Understanding the nutritional value of your dish can help you make informed choices.
Estimated Nutritional Values per Serving
A standard serving of Sweet Sticky Teriyaki Chicken Bowl (with rice and vegetables) contains approximately:
– Calories: 500-600 calories
– Protein: 30-35 grams
– Carbohydrates: 60-70 grams
– Fat: 10-15 grams
Health Benefits of the Main Ingredients
– Chicken: A great source of lean protein, essential for muscle growth and repair.
– Vegetables: Packed with vitamins and minerals, they contribute to overall health and well-being.
– Rice: Provides a good source of energy through carbohydrates, making it an excellent fuel source for active individuals.
Conclusion
Sweet Sticky Teriyaki Chicken Bowls are not just a meal; they are an experience that combines vibrant flavors with nutritional goodness. This dish is perfect for weeknight dinners, meal prep, or impressing guests. By following the steps outlined in this article, you can create a delicious and visually appealing bowl that brings joy to your dining experience. With its delightful taste and wholesome ingredients, this recipe is sure to become a staple in your cooking repertoire.


